Film Photography  

Posted by The Simple Layman

-->


It has been a while since I used my film cameras to shoot any pictures. I used them last spring and was disappointed because local labs who processed film really didn't care to process it anymore. This attitude showed in ways of poor developing resulting in thin negatives caused from turning on film developing machines and not letting them get up to full temperature before developing the film, or in exhausted developers and a unwillingness to change expensive, exhausted chemistry. My last six rolls of film were ruined to three local labs as a result. In all honesty, I understand the demand for film developing is almost none so why should labs even keep developing film at all, let alone replace expensive chemistry for a few rolls a month, or waste time waiting for machines to warm up when they have other things to do in a lab? With lab employment turn-over, because it pays so little, few people are even properly trained to handle the film let alone know why it didn't turn out. Try to explain why the numbering on the edge of a film being faded, instead of bold and distinct, is a result of poor developing, not poor photography skills, and they are at a loss to understand it. Having developed my own films in the past and actually running a photo lab back when all my adjustments were manually made instead of automatic I think qualifies me to know the difference.

So why do I bother if digital is the way to go?

Well, because I love film photography, more than I like digital, and I do like digital for many things. Digital is fun, has quick results you can see, and provides more ease of use in low light and difficult situations, not to mention easy white balance and other color balance without the use of filters. For me though, it doesn't provide the satisfaction or the involvement mentally that film does, nor the therapeutic benefits of spending time with, well, an old friend. Shooting good pictures on a camera with manual focus, aperture settings and shutter speeds while having to deal with contrast and time in a darkroom is different in many respects from digital. I suppose if all you want is a digital outcome, that is, a digital file you can view on a computer or send off to a local lab for quick prints, then yes, the average person is quite happy with the results. Why then shoot film if the only result desired is to get a quick scan of them you can view on a computer? In this case, buying a digital camera has saved you many steps and at a greater advantage.

I love the look of film, even when scanned into a digital file. That's why I still keep using film, although that has been hampered by the lack of money from being out of work for a couple of years. When I recently began looking at film for my camera I was really shocked to learn how little film stock is being produced. I knew this was happening, and last I heard, Kodak had stopped offering any processing of Kodachrome film, (the last lab to process it stopped developing it a couple of Christmas's ago). What really surprises me is people are still selling old Kodachrome stock on the internet hoping people will buy it and take it off their hands, which is ridiculous since there is no one in the world that can develop it.

Now I see that during my financial sabbatical from film photography, Kodak has stopped making all the other best all around films I used to love, (Kodak 100/200 Gold, and Kodak Elite slide film, and others). Some old stock is available from a few distributors until it is gone, but the big 'K' no longer exists for all intents and purposes. I am thankful that black and white is still available, but the companies now making color film are the ones I only ever played around with and I always ended up going back to Kodak films for best color and archival properties. I knew Kodak had sold off some of it's patents and I hoped some small, independent company who had an interest in renewing the sale of it's formulations would market them. Sadly, this has not happened. Also, finding a 200 ASA color or black and white film is near impossible because most manufacturers are only making 100 and 400 films. I preferred 200 ASA speed for all around film shooting.

It's a little late to say it I guess, and so many articles have been written about it already, but film photography will be missed when if it does finally die. Right now, for me, it is like watching an old friend just fade away from old age until he takes his final breath.


Think Back Thursday - Williamsburg Vacation  

Posted by The Simple Layman

My wife recently changed her Friday blog post called "Blast From The Past" to "Think Back Thursday."  The old blog was designed to get people to think back to things of the past in their lives.  The new blog is theme oriented, which I think is much better.  Last week her theme was "water" and anyone could post events envolving water such as visits to theme parks, the ocean, or even faulcets and running water, (like kids playing in a in the yard with a hose).  This weeks theme is "visiting historical sites."

To help her out, I decided to post pictures taken with a stereo camera of our visit to Williamsburg Virgina in 2000.  The stereo camera was built in the 1940's by a company called "David White" and was a popular camera.  Many movie stars and famous people actually owned one so mine may have been owned by a famous person.   Who knows?  The camera is designed to take side by side pictures on 35mm slide film.  It is more difficult to use because it is a manual camera, (manual focus, manual f/stops and shutter speed), but I love to use it.  Slide processing is expensive however, so I have not used it for a while.   The lens does not compare to modern lenses but seems quite sharp when used for the purpose for which it is designed.  Pictures are two 1/2 frame shots, meaning they use 1/2 of the normal full 35mm frame, one for the left eye to view and one for the right eye.

I include two enlargements, (at the end of the post), of the full stereo images so you can get an idea of what I mean.  The two pictures taken side by side are then mounted into a cardboard frame and viewed in a viewer, (similar to a viewmaster set only larger).  The two side by side picture scans I included can be viewed on a computer screen by slightly crossing one's eyes, similar to those "magic stereo images" seen in books and posters.  If you have seen those and know what I am talking about you may be able to master seeing these in stereo by focusing your mind on the center image between the two when your eyes are crossed.  It is best accomplished by viewing the image smaller then enlarging it until you can view it bigger.  To reduce and enlarge the image in your browser all is necessary, (usually), is to roll your scroll button back and forth.

The first pics are crops from the original stereo slides and are not viewed in stereo.  They are only the view from one eye.  Click on the pictures for a larger view.

The Windmill at Williamsburg.


Someone was naughty and ended up in the stocks!


The Governor's Palace - front gate.  No, we weren't invited for dinner.


The glass blowing shop in Jamestown, not far from Williamsburg.


Inside of a small church that was built at the settlement.


STEREO IMAGES

Not out of those stocks yet?


Governor's Palace - Front gate in stereo.


I hope you have enjoyed this short trip to Williamsburg.  There are many more images but these are some of my favorites.


Visit my wife's "Think Back Thursday" post by clicking on the button below.


2012 And The Demise Of The Compact Disc  

Posted by The Simple Layman

The coming of the new year will signify the demise of the Compact Disc.  Yes, you heard me right.  The music industry plans to kill off the CD sometime in 2012.  This was surprising to me as they have yet to kill off record albums which have existed since their inception and are less popular than CD's.  Evidently, people are just becoming too interested in music downloads, (Mp3 and such), and cd sales have dropped off.  I'ts hard to understand their thinking from my point of view.  The disc, which they probably pay pennies to produce, are not that unpopular and still hold quite a market.  It does however, not stand a chance against music downloads which cost almost nothing to reproduce and can be reproduced at a higher rate, can be digitally rights managed, (which cd's cannot), and have no packaging or package contents.  With downloads, shipping is not a cost factor either and companies can buy cheap computers that can spit out thousands of copies of songs by the hour with almost no human envolvement.  See the big picture?

Unfortunately what this usually means is lower quality and limited use from a consumer's perspective.  If paying for downloads becomes the exclusive future of music, then you can expect more control over what you listen to under digital rights management and cheaper sound quality, without cd's being a competitive player.  I can only lament the loss of the true audiophile who enjoyed simple yet clear stereo sound, and to my taste's, cd filled that need.  Don't get me wrong.  I love the wonderful quality of dvd audio and other hi-end surround sound, but already much of the music I grew up with is out of print and will probably never be in print again.  With the demise of the cd the chance of getting that stuff is getting even slimmer.  So with this post I want to praise the format I loved so much as well as lament it's loss by mentioning the time I first heard about CD's and my first experience with the format.

I can remember the first time I heard about compact disc.  I read it in a magazine and it sounded like the answer to all of my problems with static, noise, pops, and clicks when listening to albums. Cassette tapes were ok too, if you copied it yourself, but most of the mass produced copies were still full of hiss, bad highs, lows, or midrange or just over-modulated, and few companies were taking full advantage of it's capabilities.  Tapes made using the cheapest tape stock with the lowest quality plastic housings were the norm and sometimes these tapes didn't even play a week or so after buying them because they would bind and jam or the tape would deteriorate leaving oxide residue on tape heads causing constant cleaning.

Shortly after hearing about the new cd format I was in a music store in Dover Delaware in a sound room listening to a record album play on an expensive 1000.00 turntable hooked up to a Yamaha sound system.  I was drooling over how great the record sounded when one of the sales people who was in the room mentioned he had a copy on compact disc of the same album I was listening to.  I asked if it could sound that much different on cd?  He put the disc on but all I heard was silence.  Was something wrong?  No, it was just the lack of turntable and record noise I was used to at the beginning of playing a record.  Then the music started and it sounded like the orchestra was in the same room, only with no scratches, pops, clicks, or noise between tracks, and with much better range.  When he showed me the disc I was amazed so much sound came a disc about 1/6 the size of a record.  He told me it was more durable than a record too since nothing touched the disc surface when playing.  He then did something you would never do with a record.  He threw it on the floor, picked it up, wiped it off with his sleeve, and played it again in the cd player.  It played perfectly with no skips or clicks.  Needless to say, I wanted a cd player from that moment on, even though I recall there were probably only 5 cd compilations available in the U.S. at the time.


Some time later I purchased a cd player for about $80.00, (a bit of money back then), and my first disc.  It was a disc from Radio Shack and cost me around $10.00.  I still have that first disc and it still plays perfectly the same as the day I bought it.  I read so many complaints about how the sound of a compact disc isn't as good as an album.    Of course most of my discs are only 16 bit mastering instead of 24, but I will take a cd over a record album any day.  I have a good turntable and a reasonably good cartridge for it.  Even with the best record cleaners you still have to put the album away and go through the cleaning process over and over everytime you listen to it.  No matter how careful you are you will eventually get that scratch you are trying to avoid.  Besides this, the more you play it the more wear it gets.  You can of course record your albums and have a really great cleaning system, (and I do), but you still have that maintenance and care and you will never get away from it.


As with records, this probably won't end the use of the cd by all companies that use it.  It most likely will affect only the big hitters like Warner, Sony, and the major labels.  Smaller companies will probably still use cd's until at some point it may just become a fad like the revival of LP record albums and 45's from companies like “oldies.com.”  In any case, I will still buy them until I can no longer get a drive to play them in.


Easy Chai Recipe  

Posted by The Simple Layman

I recently purchased a great tasting Chai drink from a local store but didn't like the aftertaste it left, (made with soy milk), or the cost, ($5.00 a bottle), so I decided to create my own and do it using a raw cashew milk since I am trying to convert to raw recipes, (no, not raw meat and I don't recommend it).

Cashews make a wonderful creamy milk.  I started by filling my blender with 20 ounces of water.  Next I added 1/2 cup of raw cashews.  Next I added one chai tea bag, (cut the end open and pour out the tea ingredients of the bag into the blender and discard the paper). I used "Celestial Seasonings Teahouse Chai," but you can use any you prefer. Add 1/2 to 3/4 cup of agave nectar, ( or equivalent honey, cane sugar, or regular table sugar, depending on your tastes and how sweet you want it).  I used agave nectar because it has a lower glycemic index than sugar or honey. After initial blending, add water to bring the volume in the blender to 32 ounces.


Other options are using other types of milk; almond milk, sesame milk, etc.  I do not know how these would taste but cashews do great as a milk.  Also, you can use 3/4- 1 cup of cashews if you really want it creamy.  It cost me aproximately  $.75 per 32 ounce jar.  Since I prefer to mix the milk out of the jar with fifty-percent water I get 64 ounces out of a batch,  but you could drink it straight as blended for a creamier mix.  I also use a commercial blender so you may have to filter the final product if you do not have a commercial blender.

be forwarned, raw cashew milk doesn't last long, even refrigerated, (about 2-3 days at the most), so drink it up!  Here's a summary of what you need.

1 decent blender
1 32 ounce jar or container
1 chai teabag, cut at the end and poured into the blender
1/2 to 3/4 cup raw cashews
1/2 to 3/4 cup agave nectar, (or equivalent in honey or sugar to taste).
20 ounces of water for the initial blend, (and remainder to bring volume to 32 ounces once blended).

Mercury Living Presence CD's  

Posted by The Simple Layman

One of the things I like is music I grew up with.  My dad had a couple of albums by "Mercury" that he listened to when I as a kid.  They were some of the earliest "stereo" recordings at the time, and of course, listening to them on cheap record players I never really appreciated their sound with all the "pops" and scratches.

I've always liked classical music, I picked that up from my dad who also loved it.  He went to a music conservatory for a year and could have been a concert pianist and was recommended to do so.  I believe it was WWII that changed that for him.  In any case, he loved music in general, and I can remember him listening, sometimes for hours to music.


One of my favorites


With the advent of CD I moved away from record albums to some extent.  I have found a few over the years in mint condition and have committed to copying them from my turntable to a digital format to listen to.  I still have a few of my dad's records but don't play them because they wore out a long time ago.  Some I have replaced with newer copies on CD and some with mint recordings I have found along the way.

I believe it was five years ago when I saw my first cd copy of the old Mercury Records recordings they had begun committing to cd.  They had been out for a couple of years unknown to me. It was a copy in our library that I checked out.  I had remembered them sounding pretty good but was really amazed at hearing them in the digital format.  It sounded more full and rich with clearer highs, full bodied bass, and cleaner sound than many of my cd's with recordings made completely digital from original recording to finished cd.  I could hear distinct separations of instrments in the listening field and their placements in the orchestra.

This was the first one I purchased


Mercury Records began making stereo recordings in the early fifties using a state of the art process for them.  They used only three microphones and recorded it to a three channel recorder built just for this purpose.  Many of the recordings were practiced but recorded in just one take.  They began using 1/2 inch magnetic tape, (1/4inch magnetic tape was used for the old 8 track, reel to reel, and 1/8 inch for cassettes).  Later, they advance to 35mm film stock because of it's lower noise and more consistant recording.  The use of the three strategically placed microphones produced a more realistic sound but unlike today's recordings, once the sound was committed to tape it couldn't be mixed and altered as thoroughly as today's recordings with their sixteen, twenty-four, and thirty-two track recording consoles.  But their straight forward clarity and warmth keeps me listening to them.  I hope to increase my library of them.  On the same note, the RCA "Living Stereo" Recordings from around the same time period were done in a similar fashion and have a larger library available, (60 recordings), that have been given the same sort of quality treatment if you want to try some of those too.  I particularly like the Mario Lanza recording and the Boston Pops recordings.


This one is the second one I bought


Cover art I downloaded for the purpose of showing the one I am currently listening to from our local library and will be purchasing on ebay in the next day or two-

If you want to listen to some great timeless recordings from a by-gone day, these are the ones to listen to.


My Review Of The Canoscan 9000F-Part 2  

Posted by The Simple Layman


After the scanner arrived and I unpacked it the first thing I noticed was it's bulky size. While not any bulkier than some standard flatbed scanner, it was still bulkier than our smaller Canon Lide60 that sat on my wife's desk and had become the workhorse for our family. The bulkiness did not take long to get used to and it now sits next to my computer as my newest friend.

My intitial concern was having to put Microsoft Windows back onto my computer to make the program work. The scanner comes with Canon's own scan program, Archsoft photo, and Adobe 8 photo elements. None of these programs are compatible with linux. I had opted out of using windows several years ago choosing the benefits of open source computer software over the expensive windows software and applications you had to purchase over and over with each newer operating system microsoft produced. While I am currently working on finding the necessary open source software to support it, it does run fairly functional on my Virtual box windows XP Installation which I only use for some older programs that aren't supported anymore. I haven't bought any new windows software for about 5 or 6 years now.

The scanner comes with three film holders; one for negatives, one for slides, and one for 120 format. At this point of time I do not want to go into the software and how to work it. I found the software fairly intuitive and experimentation is the only way anyone can achieve the results they desire personally. Canon does not list a D-max value for the printer but I found it capable, at least for me, where shadow detail is concerned. It was even able to pick up or differenciate between the iris on an eye in a scan of a picture I took years ago of my mother. This was not visible even with dodging techniques when I printed it on photo paper.

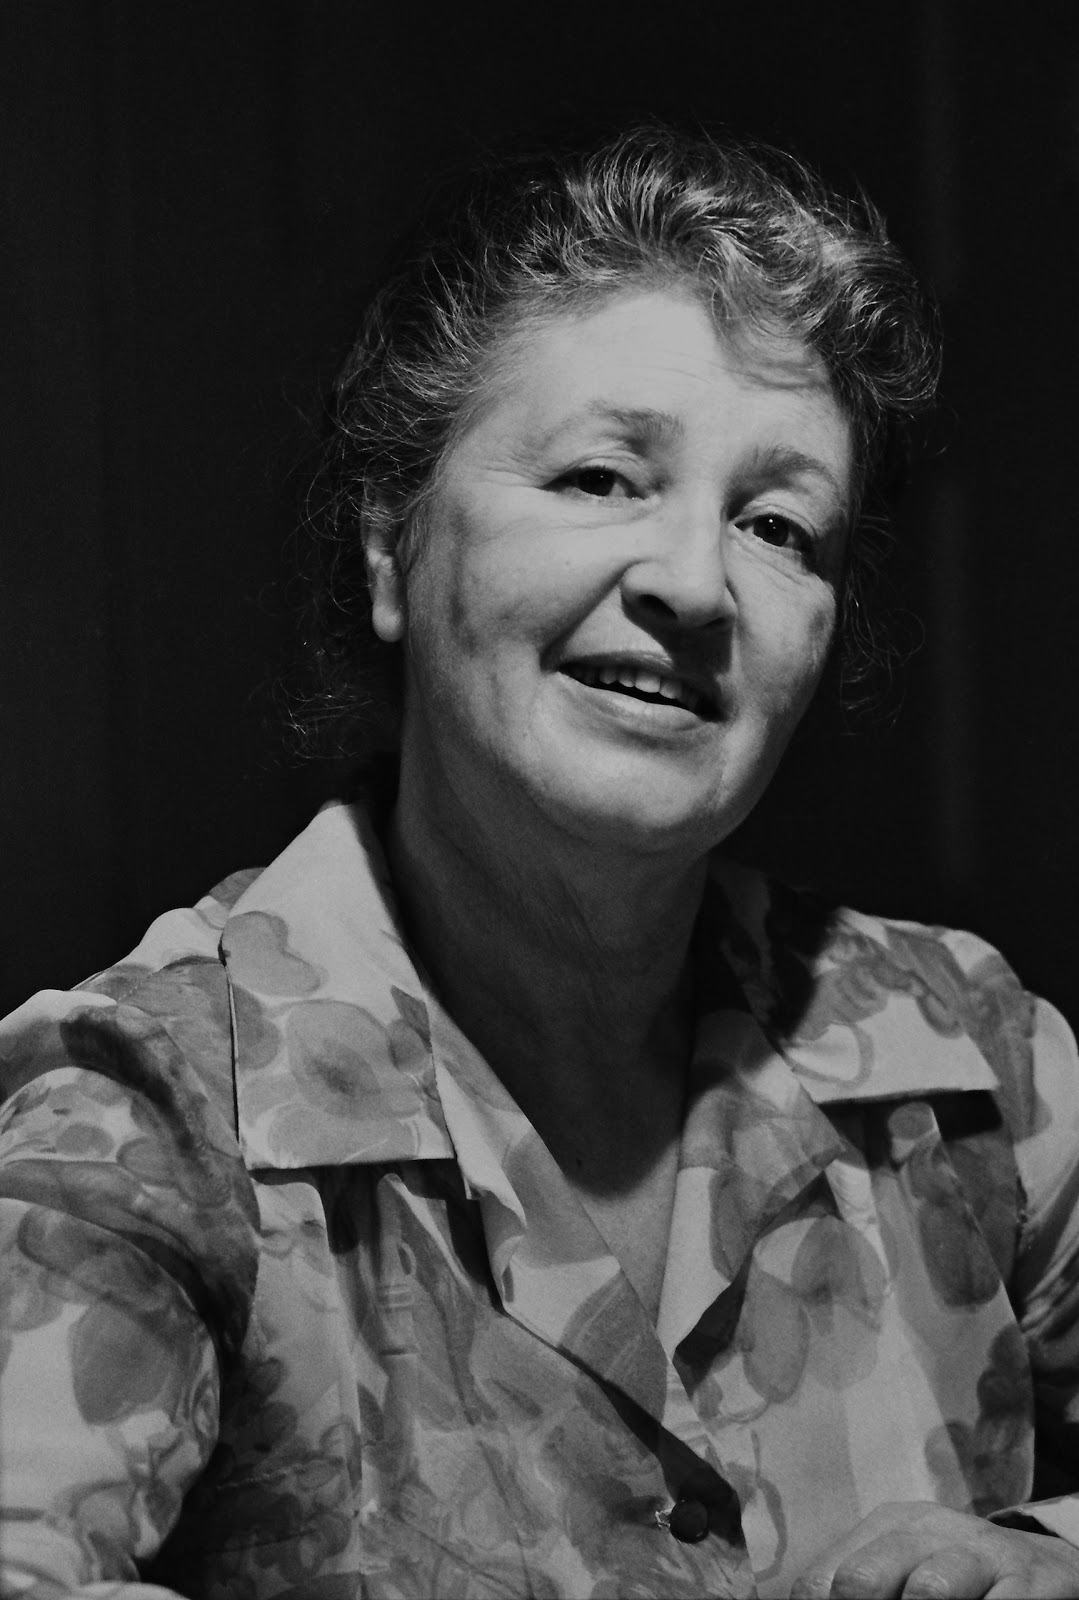
Scan of my mom taken from the Kodak Tri-X film negative.  Just "right-click" on the images to open a new window, then click on the image to see a fullsize image.


Below is a crop section showing the eye.


The scanner can scan up to a 9000 dpi, although as I understand it, acutal mechanical resolution is only available up to 4800 dpi and the rest is done through some kind of software doubling effect. I couldn't go into it more because I wasn't really interested. The higher quality Nikon and Minolta scanners only got aroung the 4000 resolution as I recall so that was enough for me. Dpi is only one judge of resolution. The actual sharpness of the lense is more important to me and I don't remember any statistics for this. The best way to judge it is subjective at best. I figured that since Nikon and Minolta both made cameras with sharp lenses, the Canon would do well too since it was a camera manufacturer. In my opinion, this is true of the Canonscan 9000F. It's lense is within the range of sharpness I expected and it is probably the best film scanner available within the price range which most people can afford.

The fact that most people aren't that quality concious with photography and simple 4 x6 prints are what most people want, high tech film photography will be left strictly to professionals who can afford it. Expensive film scans will eventually be the only way to go for those who cling to the format. This may be the last chance to get a decent scanner that can do all of your film before the film industry totally dies off in the wake of digital. There is increasingly less interest for film, and partly with good reason. Look at all the advantages for both the industry and the person.

  • Better detail in images
  • No dust
  • More pictures “turn out” and those that don't you just delete.
  • No waiting to see your pictures. Just view them at the store kiosk, on your computer, online, or in a photo frame.
  • No negatives to store. Store hundreds on cd or thousands on dvd and blu-ray discs.
  • No need to take them to store for printing at all if you keep a quality printer and don't mind the higher cost of printing yourself
  • Send them for printing over the internet from where ever you are. No need to drive to the store twice.
  • Reduced cost for the printing industry. No need to keep a film developing machine or film scanner. Now you can make money just printing the photos.
  • Don't have to worry about keeping film chemistry fresh of risk ruining someones negatives.

    Let's face it, even the cheapest digital camera pictures look better that the old 110, 127, and 35mm prints from the cheap consumer camera of the past.

Below is a picture of the film/slide mounts. The 120 mount has a plastic piece that slide under the negative and helps hold it up to prevent buckling of the film. They seem to be sturdy enough. My concern is whether they will hold up without breaking. Time will tell. They seem to hold the negative flat enough except for the 35 mm strip. If you are using a 4 frame negative, (which is the way most photo stores cut them), then the one loose end will curl at the end. To prevent this, turn the negative around and scan the one frame separately. I would think this would be a problem for most film scanners.


One of the considerations is that flatbed scanners generally have more of a dust problem because they are open instead of feeding the negative through soft brushes that remove some dust when the negative enters the dedicated film type scanner. You will need to be more dust diligent. There is a program called “fare” that does a decent job of removing dust. This program, as other type of programs, usually cause some loss of sharpness. Also, they cannot remove all dust and will not remove the worst cases. Whether or not you choose to use these type of programs, you will still need to prevent as much dust to begin with.

Overall, I found the Canoscan 9000F to be just what I needed. For a guy who couldn't afford the more expensive dedicated film scanners on the market that would perhaps later just sit in a closet collecting dust, this scanner meets all of my needs.  After all, who knows if film even be around in ten years?  If my film cameras break will I even be able to get parts or have them fixed?  Will I want to?  This scanner makes great regular scans too so I will have it for that if it holds up.

Just a couple of notes.  First, if the film is placed in the holders correctly, then the scan will be reversed of the way the picture will look.  In other words, you will have to "flip" the photo over for it to look correct.  Otherwise, the picture will be backwards and any words in the photo, (signs, printed material, etc.), will read backwards.  The proper way is for the emulsion side to face down.

Second, if you can get used to the advance feature instead of the basic, then you can do a lot of preliminary adjustments to color and dust removal before you actually scan the photo.  This is made possible because the preview feature of the scanner makes a quick pass for previewing all the photos you are scanning.  I do not use the bundled Adobe & Archsoft photo processing programs although they are fine programs.  I have been using Google's picassa & Gimp which are open source programs for years and am used to them and prefer them.

A few more scans from the Canoscan 9000F:

A pic of my wife, (center), and a enlargement of just her from a slide, (sorry, the complete fullsize image shown here is a low quality pic so don't try to get a full size view of it).  I have manually  touched it up.


An unretouched scan from a 120 black & white negative. Not sure what film type; seems to be an off brand. Sorry, the slide and the 120 are not professional shots and I did not take them.


An un-retouched scan from a color polaroid film negative I used to test a camera I repaired.


Coming up.  A comparison of a couple of scans done locally compared to the scans from the Canoscan 9000F.  How will it compare?  Do-no at this time. Got to go cut grass and run some errands.  Let you know when I get back.


My Review Of The Canoscan 9000F-Part 1  

Posted by The Simple Layman


For a long time I have wanted to convert our negatives and slides to a digital format but have been unable to do so because of money constraints and dis-satisfaction of the quality tranfers from local labs. For good quality transfers the cost increases dramatically. Because the cost for even the poor quality transfers I was seeing from local labs was so expensive for the amount of tranfers I needed done I just couldn't justify it. It seemed the only way to get the transfer quality I wanted was to send them to really expensive labs and also risk negatives getting lost or damaged.

Years ago I ran a photo-lab and during this time was able to financially afford photography as a hobby as well as on a semi-professional level. I also accumulated more than the average families share of photos. This, and my art background made me picky about quality. For the most part, even before that time, I developed my own photos leaving the color film development for a good lab. I did all of my black and white developing from start to finish. Digital photography slowly began to creep in and I am glad it has. For those who don't care or unknowingly don't know the differences between living in a digital photo world let me briefly explain. The sometimes hours of physically removing dust and making sure your darkroom is spotless so dust doesn't show on negatives is done away with because in a digital camera there is no dust to accumulate on a negative. Every time a negative is handled it can get dust and scratches that will appear in the photo. Sure, there are contraptions on the market made to aid in dust removal. But as long as you keep your digital camera in reasonably clean condition then dust will never be a problem for digital photography.

Another thing that is better in the digital photography world is having to deal with highlights and shadows. In film photography there is such limitations much time must be spent in the field trying to decide where highlight and shadow detail should be placed on a zone scale and then compensations made in development so the most detail on both ends of the scale are visible in the print. Then hours may be spent burning and dodging areas in the enlargement process to further add this detail in a print.

One of the first things I noticed when buying my first digital camera was the greatly increased background, (in room shots without flash), from that of film photography. The ability of the digital camera to pick up details in darker areas of a room during flash photography was a added side benefit. Well, the sensitivity of ccd imaging in a digital camera was boosted in the first place making it so hand held shots in darker rooms was possible so you didn't even need flash in many instances where you would have needed it in film photography. But with film photography, the background would go immensely dark in comparison to the forground with heavy shadows; something that happens less often with digital. The greatest difference, perhaps, is you have to treat digital more like slide film; shooting for the highlights instead of the shadows in outdoor sunny pictures or pictures where you want to retain highlight detail.

Enough about the photography end of things. Here was my problem in short. I couldn't afford paying someone else to scan all of my negatives and I wasn't happy with the scans I could get. I didn't want to sink 2 to 4000 dollars into a Nikon film scanner to do all of my photos and the cheaper ones didn't have the quality. I tried some dual flatbed film scanners available through photo and office stores but the quality still wasn't there. So what I did was sit on the idea and lived without until I could find one that would do the job. In the mean time, the two best scanners in a semi-affordable range, (Nikon & Minolta), stopped making film scanners all together. The only ones on the market now are way too expensive or just not worth it for me.

While reading about scanners again a few days ago I came across an article about the Canoscan 9000F. It is a flatbed scanner that does both film and regular printing and I thought, “can there be any good flatbed dual mode scanners out there.” Upon reading the article I was impressed by the scans they were showing, and all from a scanner costing less than $200.00 dollars. The scans were within the quality range I was looking for, all because of the adjustable spherical lens developed by Canon. One of the main drawbacks with previous dual purpose scanners was the preset/prefocused lenses used in all the models. I had taken two back because they just couldn't produce sharp images. While this was fine for low quality images on the internet, it wasn't fine for me. Now here was a scanner that answered the call. More on this scanner in my next post.

Blast From The Past  

Posted by The Simple Layman

A couple of weeks ago I went back to my hometown and where my wife and I once lived when we were first married.

This is a picture of the driveway of the lot where our mobile home sat.  The color photo is the one I took while I was down there and the black and white is from 1989.  The driveway that was once a hard sandy clay type material was almost completely covered with grass and weeds.  The little girl in the black and white photo is our oldest daughter who is now 24.  I wish I had thought to bring the original photos so I could position myself aproximately where I stood back then when I took the newer photos.


This is my grandmother's house now. I don't know who owns it.  You can see the differences from the older photo below.  There was a wooden railing on top of the roof, wood siding and trim, a tree line and hedges that stood on the other side of the house.  There was also a house aproximately where the mobile home stands now.  Also, I noticed there was no longer a ditch in front and on both
sides of the house.  It is now filled in with dirt and grass.  It also looks like the original half-moon shaped steps are gone.


Below is a picture of the house where I grew up.  When I was taking pictures of my old neighborhood the man who lives in the house now was suspicious of me and came out to find out what I was doing taking a picture of his house.  I explained to him I grew up there and he became friendly and we talked for a few minutes.  I appreciate his friendliness in allowing me to take pictures of the house but forgot to ask his name.

The tree in front of the house looked like a tall oak tree.  I remembered a small memosa tree in the spot where the oak now stands.  I wasn't sure my memory was correct but later when my sister and I were talking she brought up the fact a memosa tree stood there before.  There used to be a 250 gallon oil drum where the car now stands.  Surprisingly, the house was not sided all the way around and if you look closely, the side by the car is still the original asphalt shingles.  You can't see it in this picture, but in the back there is still a patio my dad built with poured concrete.  When I was 4 or 5 years old, my mom and I were standing on the top step in front of the door and my mom was talking to a friend who was standing 4 feet from the bottom step when a bolt of lightning struck the ground between my mom and I and my mom's friend.

The neighborhood has paved roads now, but then they were all dirt.


This is a picture of the house when I was young.  I am standing there with my sister.  My parents bought the house new for $6,000.00.  Wonder what it costs now?


Blast From The Past  

Posted by The Simple Layman in


Blast From the Past Blog Button - mom

My wife does this every now and then and it is always fun to participate.  She calls it "blast from the past."  What you do is blog about your past, include a picture and a little story about the picture.

This is my blast from the past.  This picture is of a tomato plant growing below our window.  The story is this:  It was Halloween and as we had been most every year, we went to a church event with them our church has every year during Halloween so the kids could play games, get candy, and be safe.  When we came home there was a tomato smashed against our window.  My wife said that she would clean it off the next day but she forgot.  A couple of days later it rained and washed it off the window.  We forgot about it.


Next spring, as we were getting ready to go to church, I looked down below the window and saw this strange plant.  Isn't that a tomato plant, I asked my wife.  How did that get there?  Finally I realized it was from the tomato that someone had thrown against our window.  That plant grew as tall as half way to the top of the window in the picture, (in the picture it is still a small plant), and gave us huge delicious tomatoes that year.  It was a perfect example of how God turned something meant for harm into something good.

Last year, a stolen vehicle plowed through our yard, hit our car, and smashed our car against our house, directly below that same window.   As I went outside in the dark to survey the damage to our car below that same window, the Lord reminded of how he turns bad things into good.


05-10-10 More Pics Of Valley Garden  

Posted by The Simple Layman

What a day!  Almost nothing but blue skys.  Only one little cloud I didn't see until after I took the picture.


Camera Information:  Nikon D3000 in manual mode.  All pictures shot using Nikon manual Ais lens 35-70 zoom.  Apertures:  various f/16-f/8@ 1/100 sec.


Using Nikon 35-70mm Ais lens on D3000  

Posted by The Simple Layman

If you are like me, perhaps you shied away from the D3000 Nikon because you were told you cannot mount the older lenses on it. This is not true.  Older Ais lenses will mount on the D3000.  However, you must be careful not to mount wide angles of the extreme variety since the lens will protrude too far into the mirror box and possibly break the mirror or other mechanisms.

In fact, I prefer to use my 35-70 manual lens for almost every situation.  The 35-70mm Nikon zoom lens is equivalent to a 50-105 because the ccd image sensor is 1.5 times smaller than the 35mm frame size.

I prefer the 35-70mm because of it's superior sharpness and less chromatic abberition that usually needs correction for shots taken with the 18-55mm stock zoom that comes with the D3000.  Noted, the stock lens is arguably a very good lens and the chromatic abberition is hardly noticable except with enlargments.  The 35-70 though has a smoothness that is appealing to me over the 18-55 stock lens.

After years of shooting with meters and grey cards I decided to just guess at my exposures, since the D3000 meter does not work with these old lenses. I was surprised to find most of my photos were properly exposed for most scenes.  If you struggle with guessing at proper exposure then you can use the old handheld meter and judge the resulting exposure on the LCD screen.  I have also used the 50mm "E" series lens which is slightly sharper, but it is simply easier to carry one lens, since the 35-70 is acceptable to me.  I also love it's lightness and find it is the only lens I need for most shots.

Below are some pics I took recently to show an example of how the D3000 fairs with 35-70mm manual lens mounted on it.  These are large pics but I hope you enjoy them. Click on any of the photos to see an enlargement.


Pictures 03-07-10  

Posted by The Simple Layman

We went for a walk yesterday, (my family and I), and got some great pics.  I adjust every one of my pictures using "gimp," because it is open-source software.  I am usually not satisfied with the camera's adjustments and like to adjust them to look more like what I remember of the scene.  I usually shoot in "raw" mode because it captures a wider dynamic range of light and detail than using the jpg mode.

The pics are fairly large, but if you use firefox you can hold down "ctrl" while scroll anywhere over the picture, and it will enlarge or reduce it for viewing.


Crocuses blooming.  Spring is almost here!

and


This one was my favorite.  This tree against the dark background amost looked like it was glowing.  I had a hard time balancing it but it still came out really good and close to what I wanted.